
Poor Quality Industrial Marking/Coding? Your Ink May Be the Culprit
This post is part one of our two-part series on choosing the right ink for product marking. In this post we explore what goes into ink composition and the many variables involved with selecting ink. Part 2 examines common substrates and ink compositions that typically work well together.
When it comes to industrial inkjet marking and coding, ink selection is as important to success as the print technology you use. These two factors – print technology and ink — must work in complete harmony with the substrate you’re printing on to ensure that you hit the mark perfectly every time. This can be easier said than done. And if you’re not achieving the quality of marks you hoped for on a consistent basis, it may be time to take a closer look at your ink formulation.
In previous blog posts we’ve compared popular marking technologies including continuous inkjet (CIJ) vs. thermal inkjet (TIJ) and piezo inkjet (PIJ) vs. TIJ. Now, in this 2-part series we’re taking a closer look at ink selection. Having a better understanding of what makes inkjet inks work for different applications will help ensure you get exactly what you want from your marking solution.
As a starting point, it’s important to know that every ink is matched specifically to the inkjet technology and the substrate. For example, an ink suited for non-porous substrates like metal or plastic bags is much different than one designed for porous substrates such as wood or corrugated cardboard.
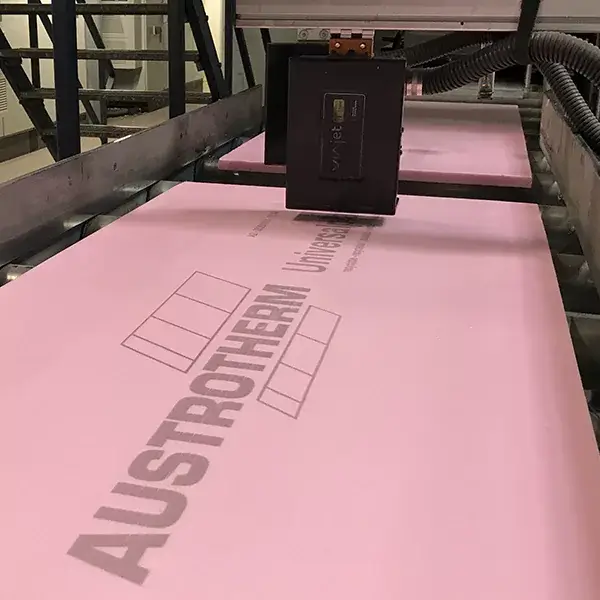
Creating marks on a semi-porous substrate such as insulation requires careful ink selection to achieve high-quality marks.
Ink composition can make or break a mark
Let’s start by diving into what goes into an ink and how the composition can affect your outcome.
While there are “simple” inks that allow for basic marking, most industrial applications require “complex” inks, which are made up of a variety of chemicals that allow for wet and/or dry film properties. These complex inks are formulated to work with different print technology and designed for such factors as dry time, adhesion, heat and UV resistance, abrasion resistance, and more.
Complex inks contain four main ingredients:
- Solvent: Solvents are the foundation of an ink. They carry all other ingredients and enable the ink to be transferred effectively to the surface. But not all solvents are created equal. Different solvents, like ketones, alcohols, glycol ethers and esters, can greatly affect the viscosity, evaporation rate (i.e. dry time) and adherence of an ink. Keep in mind that water is also a type of solvent and water-based inks are a great option for inkjet printers when appropriate.
- Resin: Resins are responsible for the final post-dry film properties of an ink. Think adhesion, abrasion resistance, UV resistance and heat resistance. Common examples include acrylic, epoxy, vinyl, rosin ester and polyester.
- Colorants: As you might guess, a colorant adds color and contrast, most often through dyes and pigments. Dyes are soluble and transparent, but don’t have good UV or heat stability. On the other hand, pigments are insoluble (and therefore allow for dispersions) and opaque, and have strong UV and heat stability.
- Additives: Additives provide more opportunity for ink customization to ensure the ink you select is well-matched to your application. For instance, plasticizers add more flexibility, surfactants can modify surface tension, waxes can help with slippage and dispersion aids can support pigment stability.
Substrate matters
Just as ink has multiple ingredients, the surface you’re printing on also comes with its own set of variables. Substrates like metal, wood, cardboard, plastic and rubber all have unique characteristics that require specialized inks to ensure durability, adhesion, readability and/or UV and heat stability.
For example, when printing on metals there are several considerations that impact optimal printing, such as:
- Whether the ink needs to be permanent or removable (or invisible to the naked eye except when exposed to UVA light)
- If the ink needs to cut through an oily, dusty or coated surface
- If the ink needs to be heat resistant to print on hot metal or withstand heat during the manufacturing or finishing process
- The type of metal you’re printing on, as inks may respond differently to stainless steel versus specialty alloy versus galvanized lines (among other types of metal)
- If there are compliance requirements, such as ink that is aerospace-approved or halogen-free
For the sake of comparison, when marking on wood, you may need to think about:
- The density, porousness and absorption rate of the wood surface
- If the wood texture is rough/uneven, you may need greater penetration; or if it is smooth, it may require a faster-drying ink
- Whether the ink needs to be permanent or removable
- If the wood contains natural oils that may impact the dry time, durability or adhesion of the mark
As you might expect, there is considerably more technical detail involved with matching inks to substrates and manufacturing requirements. To that end, the next post in this series will take a closer look at the most common substrates and ink compositions that typically work well for each.
Testing, sample marks hold the key to success
“There is no “one ink fits all” solution and finding the best ink for your application often isn’t a “one and done” activity. You want to ensure that the ink you end up selecting is able to deliver the results you expect mark after mark without exception. Getting there involves up-front testing in a laboratory setting followed by on-going evaluation of ink performance. Also be aware that manufacturing process changes, such as the use of different solvents or chemicals, may require changes to your ink formulation.
Once you have a handle on your marking requirements, the ink selection process starts by partnering with your marking equipment provider to obtain sample marks. This involves shipping samples of the actual product you want marked to the vendor’s sample marking lab. Your samples are then marked under conditions similar to those found in your plant, including matching your line speed.
At Matthews Marking Systems, we develop and manufacture our inks in-house for a broad range of applications and substrates. We typically start the ink selection process for new customer applications with an ink pulled from our extensive ink library and start creating sample marks to your specifications. You’ll then have the opportunity to test the sample marks to make sure they can hold up to abrasion or chemical agents that are part of your manufacturing process. Assuming all looks good, you may be set.
In other cases, you may need to explore a custom ink. In our case, we have a team of chemists and engineers who bring a combined 118 years of industry experience. They can create custom ink formulations that map to your specific requirements. Once a suitable ink has been developed, it is tested extensively under various conditions with the same inkjet printer technology you’ll be using. This last step ensures the custom formulation doesn’t create maintenance issues such as printhead clogging or premature nozzle wear.
The bottom line
Building a relationship with a marking and coding vendor who understands the nuances of ink production and how to adjust formulations to deliver the best results pays off in the long run. Matthews Marking Systems is dedicated to partnering with customers to make the ink selection process as seamless and painless as process. This ultimately leads to improved print performance and a higher return on investment. Want to learn more? Give us a call or send us a note using the form below – we’d love to help!